Saturday, November 02, 2019

Building a pair of DML speakers

When I first heard about distributed‑mode panel speakers (DML), I was skeptical: could a sheet of foam board and a tiny exciter rival conventional audio systems? To find out, I embarked on a DIY build. Here’s how I went from curiosity to working flat panel speakers - and what the process taught me about innovation, trade‑offs and design thinking.

I have always been fascinated by loud speaker technology.  I have owned several pairs of speakers over the years, but all of them have been conventional cone speakers.  I fell in love with the flat panel speakers the moment I saw them, be it Martin Logans or Magnepans.  I never owned one though.

It was fascinating to see how simple DMLs are yet how incredible the sound reproduction was, based on the reviews online.  I watched a few youTube videos on how to build one and read a few online forums for more info and got ready to build one.  Here is an account of how I built two pairs of the DML speakers and how they turned out.

The DML speaker is built out of a flat panel made of a light but stiff material and an exciter.  The exciter is like a speaker without the cone.  This exciter vibrates the panel to produce the sound output.  The DML speaker is unlike any cone speakers or flat panel electrostatic (Martin Logan) or magnetic ribbon (Magnepan) speakers.  The DML speaker randomly generates vibrating nodes that translate into sound output in different frequencies and amplitudes.  Due to its nature, it generates equal sound both from the front as well as the back of the panel.

The first speaker is a 2'x2' flat panel speaker made out of:
- 2'x2' (1" thick) Foamular XPS insulation board (Home Depot)
- Dayton Audio DAEX25FHE-4 24W exciter (PartsExpress)
- Gorilla wood glue
- Speaker wire
- Solder

That is it!

I rounded the corners of the board with a 3" radius.  Rounded the edges as well and removed all sharp edges.  Sanded the entire panel with 110 grit sandpaper using a orbital sander.  Applied a 1:1 mixture of wood glue and water to the entire surface.  Once dry, I applied the second coat.  This produced a sandpaper kind of finish which is what makes it an amazing sound generator.  Attached the exciter 2/5th from the top and side.  Soldered the speaker wire to it and I was done.  Check out the youTube video for more details on the steps and the reasoning behind them. 


Rounded corners.

Ready for prime time!


I hooked it up to the amp and was amazed by the sound it produced.  I was not expecting this big of a sound stage from such a small (and inexpensive) exciter.  Because of the wide panel, there is no sweet spot like with conventional speakers.  High frequency is a bit pronounced due to the size of the panel.  Imagine a tweeter the size of the panel!  It acts like that.  But, the sound stage is incredible.  I have the speaker placed about 8 ft from the back wall and 1 ft from the side wall.  Maybe the distance from the back wall as well as its omni-directional nature, the sound stage appears to be behind the speaker.  This works great for me when watching movies since the screen is far behind the speaker.

Once I completed the first test speaker, I was ready to build the larger one.  I wanted to see what effect the larger panel would have.  Boy, was I rewarded.  The larger panel had a more flatter response.  Better mids, lower highs.  I am still breaking it in.  Hopefully, it will get better as it ages.

I used the same process for building this speaker as well.  Below are the parts used for the larger speaker:
- 4'x8' (1" thick) Foamular XPS insulation board (Home Depot)
- Dayton Audio DAEX32EP-4 Thruster 32mm Exciter 40W (PartsExpress)
- Gorilla wood glue
- Speaker wire
- Matte spray paint
- Solder

This exciter is the bigger brother of the previous one and there is a marked difference in quality and sound reproduction.  It is also heavier and bulkier.  The only problem with this foam board is that it is scored to make it easy to break it into pieces.  I was afraid that the score lines would create unnecessary vibrations and hence I poured glue into the cracks and sealed them.  I was a bit over zealous and ended up with awkward looking glue lines in the speakers even after sanding them.  Lesson learned.  I would take a fine tube and just squeeze the glue into the cracks and wipe off any extra.  This will keep the surface clean looking.  From this large board, I was able to cut out 2 20"x44" pieces and I am still left with half of the board.  Is 20"x44" the golden ratio?  Absolutely not.  It is not even close to the bronze ratio (if there is such a ratio).  I had to choose between great sounding speakers and good looking speakers.  I chose to compromise and go for good looking ones in order to make sure I could keep them "inside" the house and not in the garage collecting dust. 

I followed the same procedure as earlier to prep the boards, paint them with glue to generate the sandpaper-like surface.  Once the glue dried, I painted it gray with the matte spray paint.  I attached the exciters using the same formula (2/5th) and soldered the speaker wires.


Cutting the corners with a knife.


Filling the scored cracks with glue.


Painting it with 1:1 glue-water mixture.


Panel is ready for testing.  The ugly lines are the scored lines where I applied glue.


Big brother with the younger brother, before the final paint job.

A-B testing.

I also took this opportunity to design and build a pair of stands for the speakers.  I went to Home Depot and bought some poplar boards of different sizes.  The design is a simple inverted T supported on the back by a beam.  I cut the wood to the desired size put the stand together with one screw.  I then coated it with polyurethane to protect it.  I bought dual-ended gold speaker binding posts from PartsExpress and affixed them.  I use one end to connect to the amp and the other end to go to the speaker.  This allows me to disconnect the panel from the stand for transportation or storage.  It also lets me switch panels on the same stand.  I attached soft foam for the bottom and back support so that the speaker is not touching any hard surface.  I used a soft multipurpose cleaning sponge to create these supports.

The final product.


Back supported by a soft sponge.

Dual-ended speaker posts.


I did not expect the panel to reproduce the entire range of frequencies from 20 Hz to 20 kHz.  The smaller panel has pronounced high frequencies whereas the larger panel is well balanced.  The smaller panel lacks mid frequency response.  It completely lacks low frequency (below 150 Hz) response.

As seen in the youTube video, I think making panels with 2-3 different materials and using a crossover will give the best full range speaker.  I am happy with the results so far and am going to enjoy these speakers for the time being.

Here is the final setup.  The speakers were moved into the room to fit in the picture:


Here is a demo of how the speaker sounds.


The larger panel is better at reproducing mids whereas it also lacks low frequency response.  I had to pair it with a sub-woofer to take care of 20 - 150 Hz.  Overall, I am very satisfied with the build.  It was a fun experiment and a great DIY speaker to show off.

Saturday, June 08, 2019

Customer service is dead!

That is what I thought, especially in the air travel industry. 

Until my visit to China recently. 

During my domestic travel within China, three things reminded me that customer service in the airline industry was still alive.  At least, outside of the United States. 

First, everybody was offered a free hot meal on any flight over 2 hours!  I still remember the days when Continental would offer hot meals to everybody on domestic flights.  Gone are those days in the US. 

Second, personalized service for every passenger.  On one leg, my neighbor was fast asleep during the entire flight.  When the flight attendants came with food and drinks, they noticed he was asleep and left a note (see note on the right in the pic below) letting him know that they missed him.  And, just before landing, they noticed that he was still asleep and came back with a second note (one on the left) providing information about the arrival city.  They did this to every passenger who was fast asleep!  Now, that is what I call good customer service. 


Third, I noticed thoughtful service even at the airport.  We are all used to the luggage carts lined up in their parking spot.  In some airports, you have to pay to pull out a cart.  In the Shanghai (Pudong) airport, I was surprised to see the luggage carts neatly lined up along the conveyor belt.  Passengers would just come to the belt, grab their bags and load it onto one of the nearby carts and roll away! 


Companies need to look for simple ideas like these to improve their customer service.  Simple gestures like this is what makes up delightful customer service.  You don't have to spend a lot of effort or resources to make your customers happy.   

Saturday, January 21, 2017

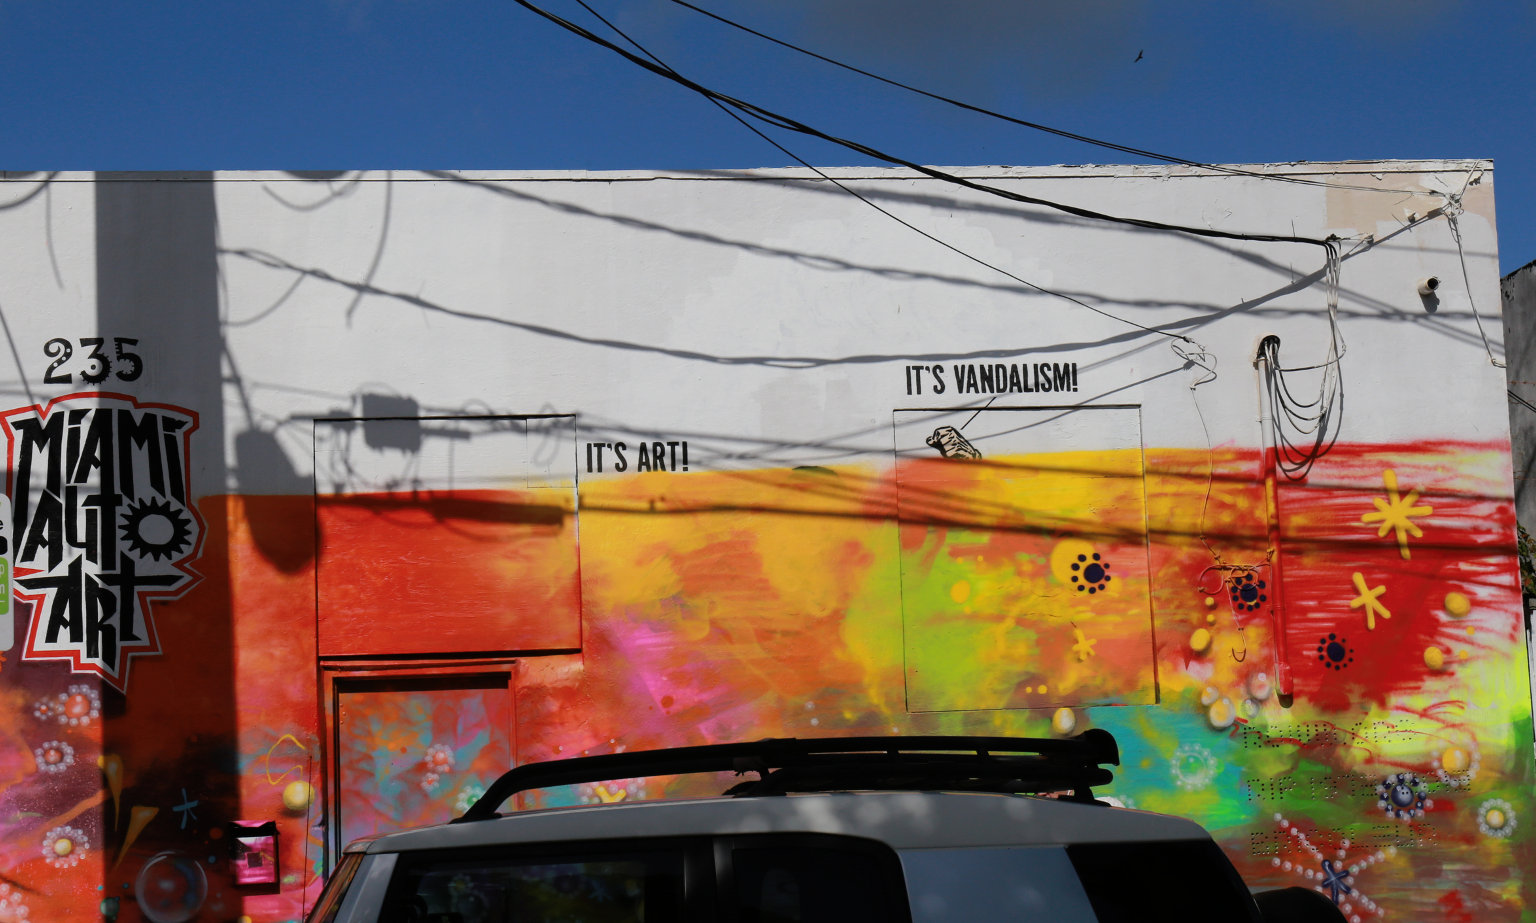
Urban street art - Miami Wynwood walls

I happened to visit one of the best places to see urban street graffiti art: Wynwood walls area in Miami, Fl.

The actual Wynwood walls are just a collection of six walls from neighboring buildings.  These walls contain an amazing collection of wall art by artists from around the world.  What's more, the area surrounding the walls has also been converted into artists' canvas.

One gripe, though, is that Miami allows street parking along these murals.  There are several parking lots in the area and it would be best if street parking is eliminated so that people can view and appreciate the art better.

Here are a few pictures of the amazing art in the Wynwood area:


Sunday, February 28, 2016

Customer Service - How not to do it

In the day of omnipresent internet, mobile, social media and instant gratification, customers crave for instant answers to their questions.  If the product doesn't speak to you (either by being intuitive or by literally speaking to you), the product doesn't fly. 

I recently stumbled upon a product that literally asked the user to send an email to obtain installation instructions or get questions answered.  Duh!  Are we in the 19th century or what? 


The picture above shows a card that was attached to a hammock I recently bought.  The design is pretty close to being intuitive but can be confusing when it comes to attaching the ropes.  I expected to see instructions printed on the card but all I find is an email address.

What happened to printed instructions?  It could be text or pictures.
What happened to a web site with a user guide?  Video or text or a downloadable document.
What happened to an instructional video on youTube? 

Companies need to embrace the current trends in marketing and attracting customers.  Not just stay in the 19th century. This is such a simple product, a few drawings showing how to tie the ropes would have sufficed.  But the company wants an email from you.  I wonder what happens if they get a million emails from their customers.  Think of the cost of answering them (nope, I don't want a robotic reply) versus a simple illustration on the card attached to the product.

Everyday, I learn something new. In this case, a 'what not to do'.  

Wednesday, November 04, 2015

Delighting the customer

A while back I wrote about innovation in elevator technology.  Recently, I noticed the opposite in the heart of innovation: Silicon Valley. 

I was at the San Jose airport car rental center.  The rental center sees a lot of traffic and they have graciously installed what looks like a dozen elevators (it is actually a bank of 8) over a wide area.  There are several locations with buttons for summoning the elevators.
 

What is interesting about this arrangement is that when one calls an elevator, irrespective of which set of buttons you use to summon the elevators, any of the bank of 8 elevators could answer.  Seldom have I seen an elevator close to me answering my call.  What this means is that the user has to walk all the way (lugging their luggage) to the elevator.  Some times, the elevator moves away by the time you reach it, making it even more annoying. 

We all know that large traffic only enters the ground floor at the same time: whenever a flight lands.  The elevators be programmed so that any idle elevator car always comes to the ground floor to wait.  It may be a bit inefficient, but makes the customer delighted.  Imagine walking into the rental center to find one or more elevators with open doors waiting for you!  That should put a smile on anyone's face. 

Another feature that can be incorporated is assigning a bank of 4 elevators to the closest buttons.  San Jose has two banks of elevators and they could be separately programmed.  Paired with the previous suggestion, this will delight anyone visiting the Bay area. 

Saturday, November 22, 2014

Eindhoven GLOW Festival

Eindhoven, a city in the Netherlands, hosts an annual light festival called GLOW.  Eindhoven is known as the City of Light, mainly because of the fact that it housed several match stick factories.  And, then Philips established its light bulb factory. 

I was lucky enough to be in town to experience GLOW 2014.  It was a fabulous experience and some of the installations were mind-blowing.  The city had spent considerable amount of resources to put this project together.  The entire project spanned over 20 installations spread around the city center (Centrum, as they say in Netherlands).

The installations were in the form of light installations, sculptures, projections as well as live performances.  Some of the installations were elaborate and involved high-tech equipment. The entire 'show' started at 6 PM and went on into the night. 

One of my favorite installations was the 'Parklaan Flashback'.  This installation captured the history of Eindhoven at the beginning of the twentieth century.  The show was a light projection on two buildings facing each other.  Spectators stood between the two buildings and watch the show.  The show is synchronized between the opposite buildings and moves from one building to the other.  Different scenes are depicted and 'painted' on the buildings using light with accompanying music.  It made for a spectacular show.  I shot both video as well as still images.  Here are a few of the still images:


The 'Pendulum Wave' was a piece of art built on the principles of pendulums.  This was a great engineering installation with 15 pendulums of varying lengths suspended from a frame.  At the end of each pendulum was a lighted ball.  All the pendulums were simultaneously raised to the side (I guess, using electro-magnets) and then let go.  The pendulums formed interesting patterns governed by their lengths.  As the pendulums swung, the balls would change color.  The entire experience was enhanced with music and fog.

The 'Figures that Wander' was a shocker amongst all the exhibits.  This was the only 'live-art' in the whole festival.  The performance involved four dancers dancing behind semi-transparent plastic curtains.  They formed shapes using light and shadows.  Initially, I thought that this was a projection onto a semi-transparent screen, just like all the other installations.  After watching for a few minutes, I realized that this was indeed live, and there were people performing behind the screens.  This was the most creative, bold and provocative art installation in the entire festival. 


The 'Enchanted Cathedral and the Seasons' was an innovative art creation using high powered color projectors.  Computer generated images are projected onto the façade of the cathedral to depict the four seasons.  Again, the animation was accompanied by lively music.


Here is a view of the cathedral from my room.


'Stereo' was the video mapping projection done on the façade of the Augustijnenkerk cathedral.  This cathedral was right next to my hotel and I could see it from my window.  This audio-visual production transformed the cathedral into a living and moving structure.  Set to music, the high powered projectors painted the façade with features and made the features undulate to music.  It was an interesting way to convert an irregular surface into a projection surface and paint pictures. 


There was another show inside the cathedral.  Even here, they had used a half dozen synchronized projectors to project images onto the tall ceiling as well as the walls of the cathedral.  I was surprised to note that each of the projectors was using film instead of digital technology.  The entire show was cued to baroque music.


All in all, it was an amazing experience.  I heard that other European cities are also hosting such GLOW events and I can't wait to visit them and experience GLOW again.

Saturday, April 19, 2014

"What do you do?"

A simple question that reveals how passionate someone is about their occupation. You meet someone at a gathering and ask them their name, and they enthusiastically (and almost immediately) reply. You ask them where they live, and you get a similar enthusiastic quick reply. Then, you ask them what they do, and you will see two kinds of people:

The first kind is the group of satisfied and successful professionals who exude the confidence and are enthusiastic about their profession. They reply with the same enthusiasm and quickness.

The second kind is the group of people who are not really excited about their occupation, and are just going along to make a living. These people will drone about what they do without any excitement or enthusiasm. These are the ones that need to look inside themselves, find what they are passionate about, and go after it.

Find an occupation that makes you proud. Find an occupation that makes you get up everyday looking forward to going to work.

I remember reading a resume writing book where the author said that we should fine tune our resumes until it is fit to be framed and hung on the wall. Same here. You need to find a profession that you are proud of proclaiming it and announcing it to the world.

Find your passion today and go after it.

Saturday, November 30, 2013

Airplane seating

How many times have you boarded an airplane just to stand behind a bunch of people trying to cram their luggage into the overhead bins or waiting for others to give way so they can get into their window seat?  I have been in a lot of these situations and that is what got me thinking about how an airline can make this more efficient.

A plane on the ground is a plane not making money for the airline.  That is the reason why airlines try to turnaround their planes as fast as possible. 

Disembarking is simple and happens efficiently: passengers milling out of the plane starting from the front to the back, aisle to window.  It is boarding where all the confusion lies.  There are three predominant patterns used by most of the airlines: free seating, back to front and zone based seating.  United is the only airline that uses outside-in seating. 

Southwest uses free seating.  The main problem with this approach is that everyone wants to sit in the front of the plane (less engine noise, faster to disembark, less lateral movement, etc.).  Also, no one wants to sit in the middle seat.  This means people start filling the window and aisle seats from front to back.  The problems with this approach are that people have to wait in the beginning since others are holding up the line as they find their seats up front.  Later on, the process speeds up as people start moving backwards.  And, at the end, it slows down again when the middle seats get occupied.  One advantage is that there is never a situation where two people have to get up to let a passenger get to his/her window seat. 

Most of the other airlines seat from back to front in zones.  This causes packs of delays within the zones as people board in random order within the zones.  Add to this mix, the elite travelers who board prior to all others.  A lot of elite travelers prefer the aisle seat leading to more delays as the other seats are occupied. 

United's approach loads the windows first, followed by middle and then the aisles.  This would mean that there is no need for any passenger to get up once seated.  But, unfortunately, the elites mess this up too.  The elites board first and could be seated anywhere on the plane. 

We could come up with all kinds of sequences to make boarding as efficient as possible, but, still we will have issues with each of these approaches.  The main culprit being carry-on luggage.  Finding space for carry-on luggage is the biggest concern for all passengers, and hence the rush to board. 

In an Utopian world where passengers did not carry any luggage on them, boarding would be a cinch.  Any of the above approaches would work pretty well. 

One obvious answer is to eliminate carry-on luggage, especially the ones that fit in overhead bins.  Laptop bags, backpacks and purses that can fit under the seat and could be fine.  The big increase in carry-on luggage has happened since airlines started charging for checked-in baggage.  It would be interesting to see how this has increased the boarding time.  If it is significant, then, airlines could charge for carry-on luggage too.  This would bring us back to the good old days of no charge luggage.  Airlines can make more money from baggage fees, as well as increase the turnaround time. 

Another answer is to open all doors and load passengers from all of them.  Especially on the wide body jets with two aisles, opening doors on both sides will speed boarding incredibly.  For the smaller planes, opening doors in the front as well as the back would do the trick.  But, that is not really possible since all airports have only one jet bridge assigned to a gate.  A redesign of the gates and bridges would be very expensive. 

A few airlines are still experimenting with various strategies for boarding (alternate aisle and window, back to front, eliminate elite early boarding, etc.).  But, the airlines are knocking on the wrong door.  The boarding process is very well optimized.  It is the carry-on baggage issue that needs to be addressed by either eliminating overhead bins, or by reducing the carry-on luggage.  This would either mean charging for carry-on baggage or eliminating them completely.

It would be interesting to see if there has been an uptick in boarding times since baggage fees were instituted.  If there is, it makes sense to address this problem by focusing on the carry-on luggage.

Tuesday, September 10, 2013

Building Motobecane MTB 550HT

All these years, I have been walking into a LBS to buy my bikes.  This summer, I thought of buying a bike online and assembling it for my daughter.  Here is an account of how easy it was to assemble a Motobecane 550HT Mountain Bike. 

The 550HT is a bike with pretty decent components for the price.  It comes with an aluminum frame, Suntour XCT shocks, SRAM X4 derailleur as well as Tektro Draco hydraulic disc brakes.  I was against buying hydraulic disc brakes (didn't want to get into the bleeding routine), but after trying them out, convinced myself to get one.

The bike came in a box with not a lot of cushioning.  Luckily, nothing was broken or bent out of shape. 


The frame came with the rear wheel assembled with the crank and chainset in place.  The fork was also assembled.  Everything else was loose.  Almost everything needed some tightening and greasing.  The tools needed to assemble this bike are simple: a Phillips screw driver, metric Allen key set, 14mm spanner to tighten the pedals. 


Once the bike was assembled, it was time to tune it.  The derailleur needed some fine adjustments. The brakes needed adjustment since the pads were rubbing against the disc.  Luckily, I didn't have to bleed the brakes.  I bought a bleeding kit online, just in case.  The head needed tightening. 

Then came the tough part: wheel truing. 

Both the wheels had loose spokes and needed truing since they were off by more than a mm in at least one place.  Luckily, I found this site which made truing a simple task.  I inverted the bike and got to work with the spoke spanner I bought from REI.  BTW, the local REI mechanics were great in guiding me on what to lubricate and what not to touch. 


After all the final adjustments, it was time to take the bike for a spin. 

Overall, the bike is great for the money.  I am sure it won't withstand the punishment some of the extreme trails at Duthie hill park have to offer.  But, it holds up to my daughter's style of riding. 

Wednesday, May 30, 2012

Design for Assembly


Good designs are always simple.  They are so simple that you don't realize it if you don't think about it.  I recently bought a patio table from IKEA.  As always, IKEA does a great job in packaging and instructions.  It was a complex piece of furniture with collapsible leaves and a glass top.  But, it came with simple instructions, set of fasteners and the tools required.  How many manufacturers think of including the tools needed?

As soon as I unpack the fasteners I usually dump them all into a bowl to make sure I don't lose any.  BTW, what is wrong with including a couple extra screws and nuts with any item shipped?  Have you ever lost a screw or a nut and found yourself running to the local Home Depot to pick a spare.  It is the most frustrating experience.  You are so pissed that you want to return the piece of junk (after an hour of assembly labor, you discover that a bolt is missing), but you cannot, because it is half assembled and will not fit in your car anymore!  Morons.  If the BOM calls for 24 screws, throw in 25.  I know that in the small scheme of things, every piece matters to the bottom line, but in the big scheme of things, customer happiness trumps everything.

Back to the patio table.  Here I am with my bowl ready to pour over the fasteners.  I open the blister pack and tilt it into the bowl, but nothing falls.  I then notice that the clever engineers at IKEA have used a soft double sided glue strip on the packaging (see pic above) so that the washers and nuts stick to it until I pull them apart. What a clever idea.  The cardboard holds the fasteners for me until I need them.  These simple things are what count for immense customer satisfaction and pleasure.  This is what IKEA excels at.

Have you ever wondered why IKEA has the designer's name printed on every product?  In case you have not noticed, all products have the designer's name printed on the packaging.  It achieves two things:  for one, it honors the designer for the work they have done.  And, two, it makes a public statement about you.  Imagine the designer who created the chair which keeps falling apart.  "Inga, your chair is the worst chair I have ever sat on.  You are not fit to be a designer". On the other hand, imagine your pleasure when your fans call to tell you how great your designs are!

Every product I buy, every product I assemble, teaches me a lesson.  It is amazing to see companies like IKEA, Apple and others push the boundaries in customer convenience and satisfaction.  All other companies should follow their lead and design products that are convenient to assemble as well as use.